Sky replacement is the art of taking the sky from one photo and putting it on top of the sky in another photo.
At its most simplistic, it’s used to change the mood of a photograph, to add drama, to create a more visually striking final image.
Now, me saying “taking the sky from one photo and putting it on top of the sky in another photo” makes it sound an easy thing. It’s not.
The intended substitute sky needs to meet a number of initial requirements; angle of the sun, time of day, time of year … yes, there’s various blending techniques that can be used to overcome shortcomings in any/all of these areas, but matching the above requirements right from the outset in the intended replacement sky photograph will help the image matching process greatly.
This isn’t a tutorial, there’s any number of those available for you by just a quick online search if that’s what you’re looking for, this post is about detailing the choices I made during my first sky replacement and maybe providing a little information on those choices that will help others in search of a little advice when they attempt their first sky replacement process.

As you can see in the above image, the sky was totally blown-out on the left. There was no information in that side of the sky to pull out. Checking in Lightroom I think it had colour values of 98.9% white, and there’s no amount of recovery attempts that could pull any details out from that. The right side of the sky does have some colour, but overall the sky just couldn’t be recovered enough to rescue the photograph.

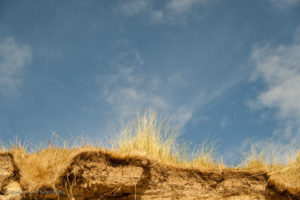
I attempted to use the sky from an image (above) of the same location. This image was taken just to the left of the composition needing editing.
I deleted the top of the posts and attempted to then use that sky, but despite it being the same location, on the same day, I just couldn’t get an accurate enough match between the substitute sky and the colour of the sea, so I went looking through other images to see if I could find a more suitable match.

I used the sky in the above image for the final replacement in the original photo. This image was not taken on the same day or even at the same location – it was taken the day prior and part of a series of images which made a panorama, but the tone of the blue matched the sea much better in the final image.

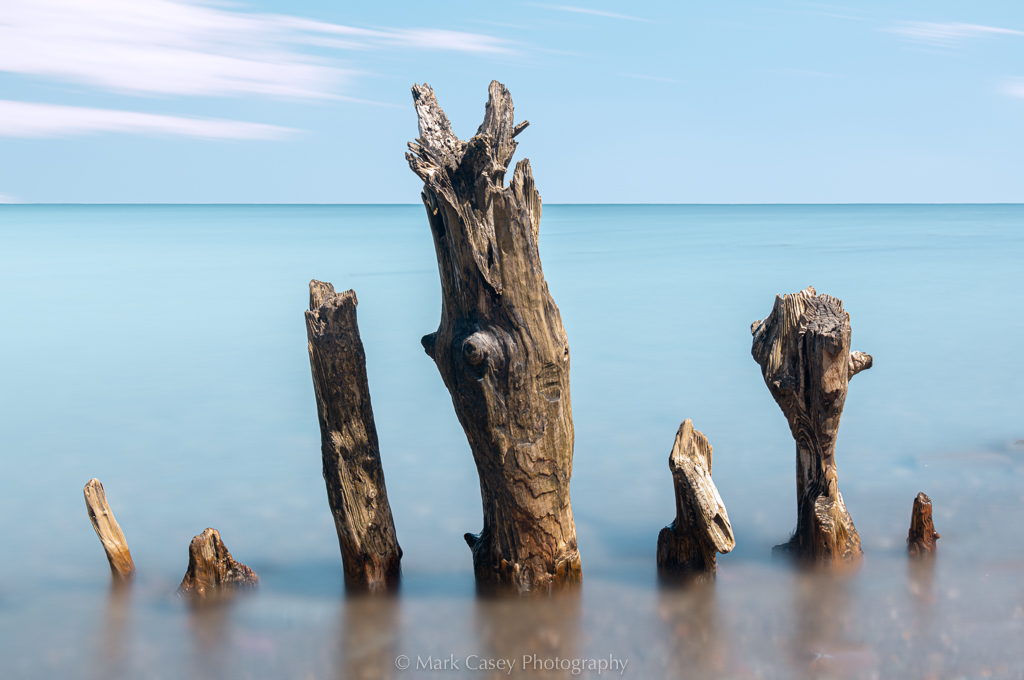
The final image.
You can see how the sky and sea have a much better harmony in the final image than they would if I’d used the sky in the rejected photo. You might also notice that I decided to erase the outcrops of land from the horizon, this is mainly because I’m not proficient enough at image manipulation yet that I could keep the land in the image without a horrible fringing to it.
I added a little movement to the clouds as it is clearly a long exposure image and having all the detail in the clouds just wouldn’t make sense, and I like the way the clouds almost act as a lead to the top of the central pillar, directing viewer attention to the central compositional element and then down into the image to the lower elements.
My biggest take-away from this experience – aside from paying more attention to my composition whilst I’m at the location – is to make sure that the lighting makes sense in both of the images that are going to be merged.
Replacing an overcast sky in a photograph with one of a clear sunny day won’t make any sense unless you have the patience to go about adding harsh light and shadows to better match the lighting conditions created by such a sky.